How to Create a Stunning Gallery Wall at Home
Gallery walls are a fantastic way to showcase your style and add visual interest to any space in your home. They can be a focal point in a room, and with some planning and creativity, you can create a display that reflects your unique taste. In this blog post, we’ll guide you through the steps to create a stunning gallery wall at home.

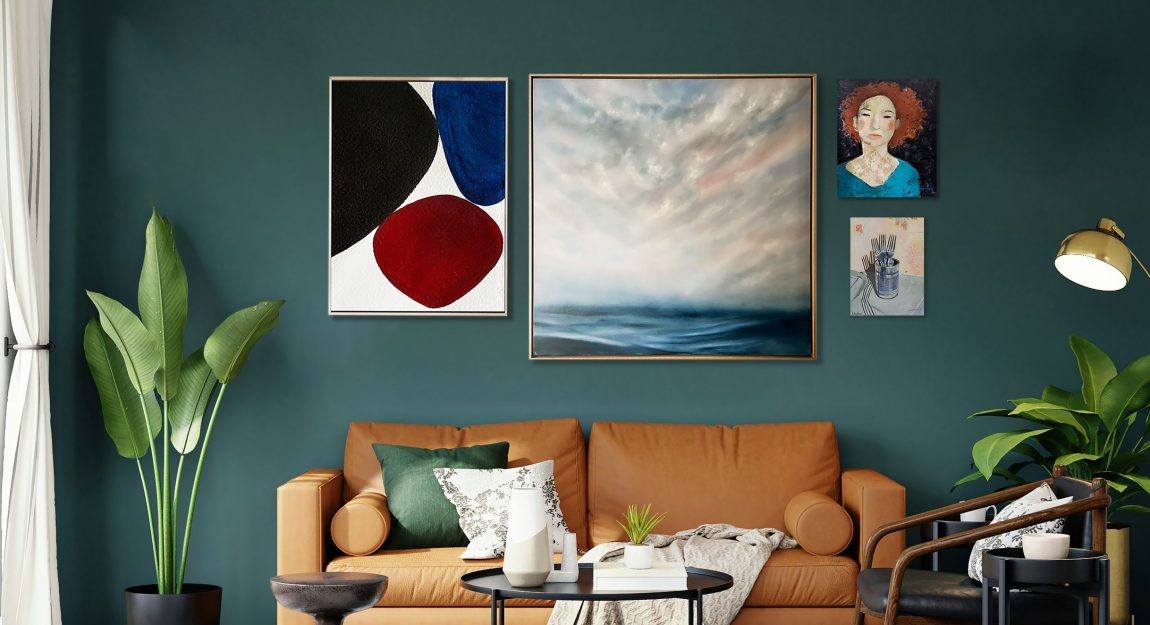
Want to make this glorious gallery wall yours? Click the image to shop the collection online today.
Step 1: Plan Your Space
Before you start selecting and hanging artwork, take some time to consider the space you’re working with. Measure the wall you want to use and consider the layout you envision. Consider factors like the size and shape of the wall, as well as the furniture and other elements in the room. This will help you determine the overall look and feel you want to achieve.
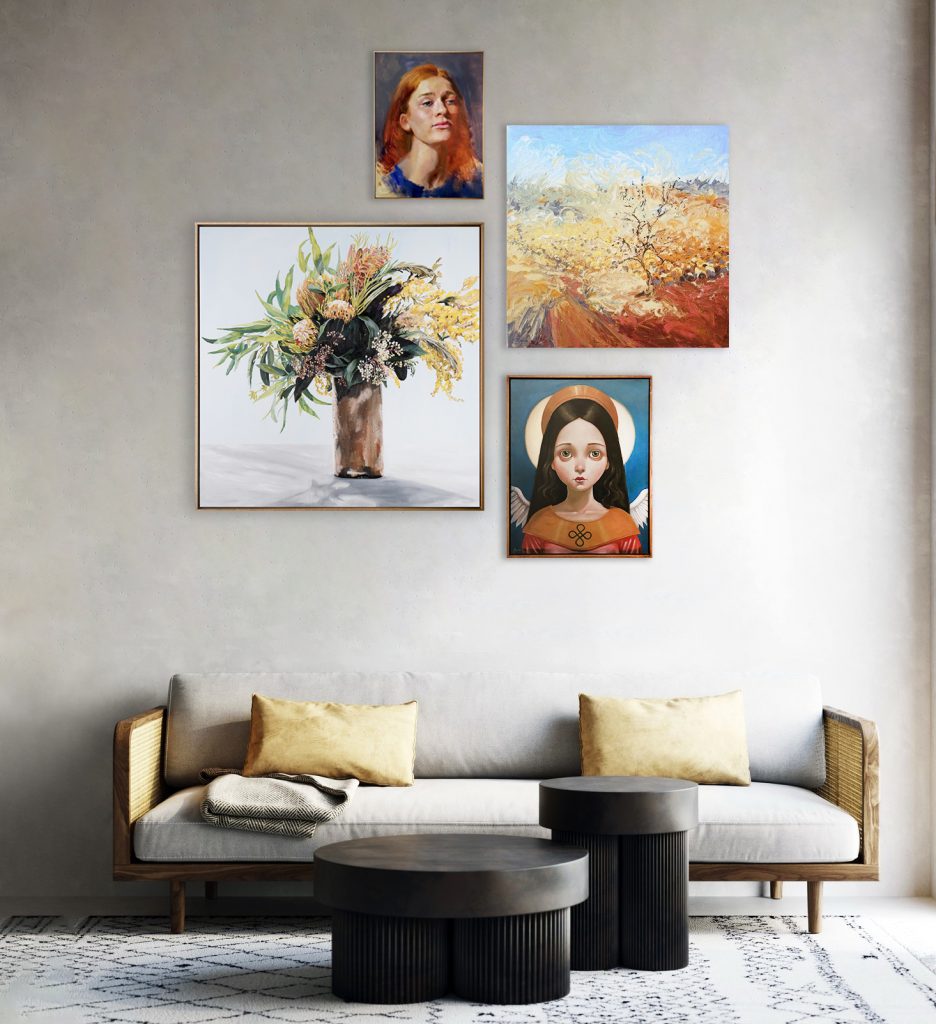
Bid goodbye to bare walls. Click the image to shop this golden gallery collection online today.
Step 2: Create a Cohesive Theme
While gallery walls can be eclectic, having a cohesive theme or colour palette is important to tie everything together. This could be based on a specific colour scheme, a common subject matter, or a particular style of artwork, such as a wall of portraiture, still life, or landscape art.
A unifying element will help your gallery wall feel more intentional and curated, but don’t be afraid to mix different styles and mediums for an eclectic and dynamic display. Curator’s tip: Your gallery wall can be a mix of framed photos, prints, paintings, mirrors, and other decorative items. For inspiration, check out Bluethumb’s Daily Picks.
Greet your guests in style with this perfect pink entryway! Click the image to shop the look.

Step 3: Frame, Arrange and Mock-Up
Make sure to consider your overall theme when selecting the style and colour of frames. Choose the same frames for a cohesive feel, or mix and match for a more eclectic vibe. Bluethumb has a fantastic range of original Australian art for sale and quality hand-made Tasmanian Oak frames in natural, black and white. Add a custom frame to your order today!
Once your artwork arrives, lay your pieces on the floor or a large table to experiment with different arrangements. This allows you to play around with the placement of each piece until you find a layout you’re happy with. Take a photo of your mock-up for reference.
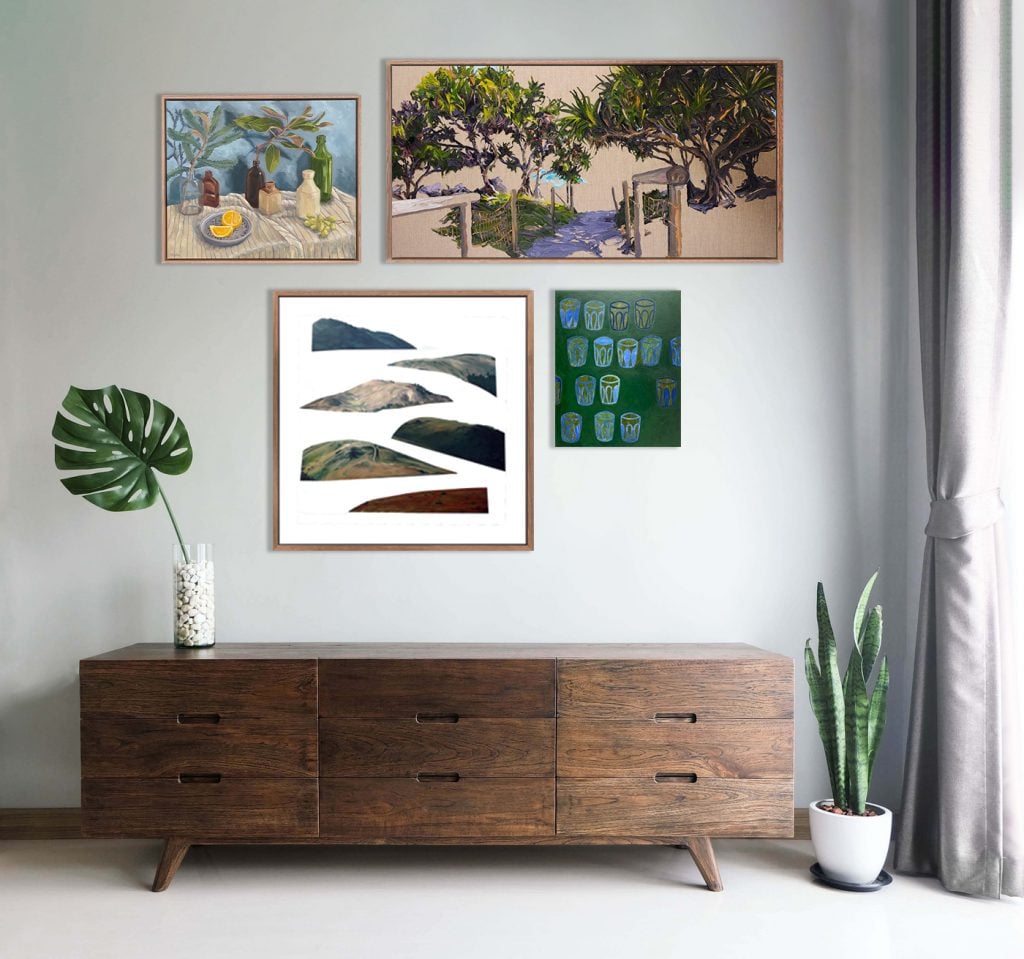
A wall for nature lovers that brings the outside in with natural oak frames, and a deep green, blue and neutral palette! Click the image to shop the earthy gallery wall.
Step 4: Measure, Mark and Hang
Using the measurements and layout from your mock-up, mark the positions on the wall where you’ll hang each piece. This will help ensure that your gallery wall is balanced and well-proportioned. Once you’ve marked the places, start hanging your artwork. Use a level to ensure each piece is straight and at the desired height.
Want to display art without upsetting the landlord? Discover 5 Renter-Friendly Ways to Display Art.
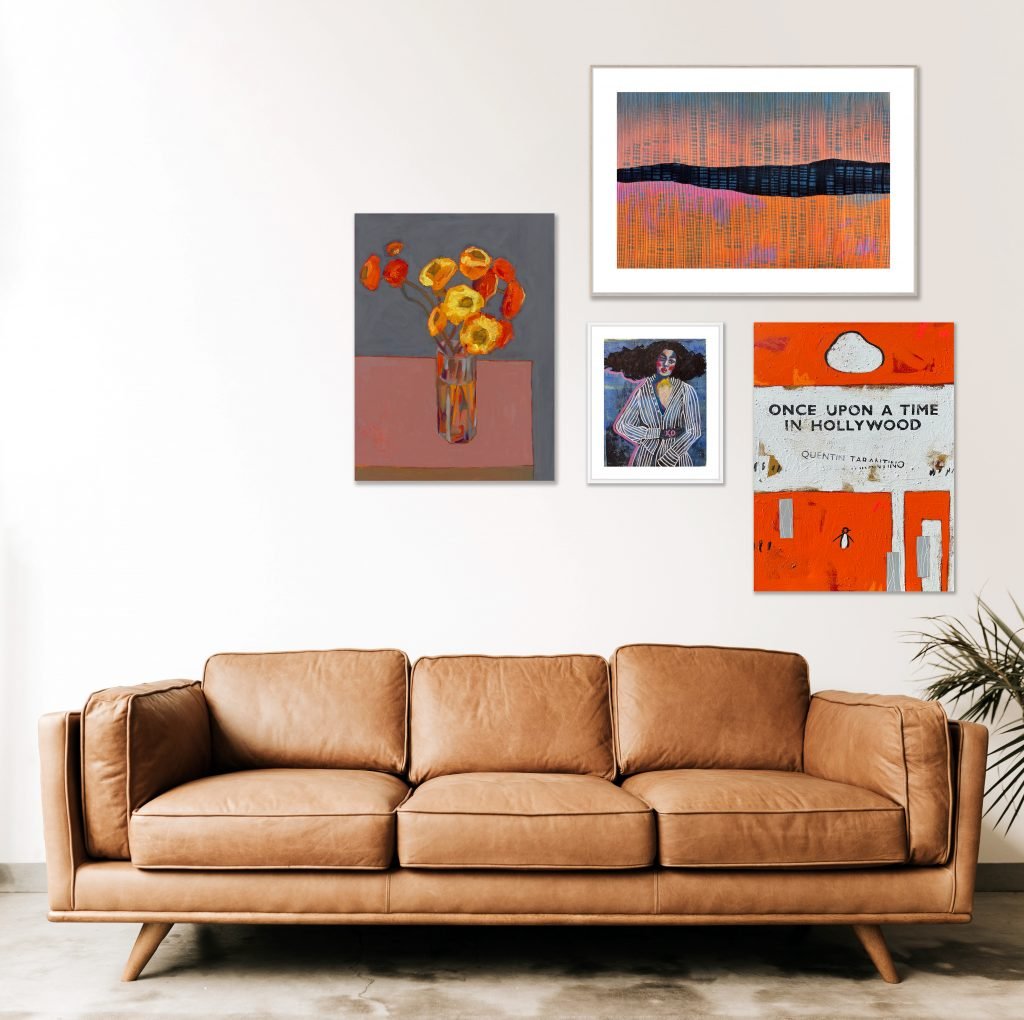
A perfectly cohesive gallery wall with pops of orange is the focal point in this lounge. Click the image to shop the look.
Creating a gallery wall is a fun and creative way to transform any room in your home. Remember to trust your instincts and have fun with the process! Tag #mybluethumbart when sharing your gallery wall on socials.